How to create a contact form with Supabase & Next JS
An introduction to Supabase - Part 1
Published: April 10, 2023
•
Updated: November 15, 2023
Supabase is an open source Firebase alternative and helps you to build faster and focus on your products. As someone that likes to test out ideas once in a while, Firebase and Supabase have been interesting to work with.
In this tutorial, I will walk you through an introduction to Supabase, setting up a Database table, creating a simple contact form in Next JS, and putting it all together.
I assume you have basic knowledge of Next JS to follow along.
To follow along with the Next JS project, check it out on Github. The contact form demo is also live.
Supabase
Creating a Supabase account is pretty simple. Visit Supabase and click on the "Start your project" button.
First, create an organization

Next, create a project

On the next screen, your project API keys will be displayed. Copy the public key and keep it aside. We will use it later in this tutorial.

Copy the URL under the Project Configuration section too. This will be your base URL for the project.

Next, we will create a table for the contact form.
Create a Database table
In the section below, click on Database

A blank page will be displayed. Click on the button to create a new table and follow the steps.
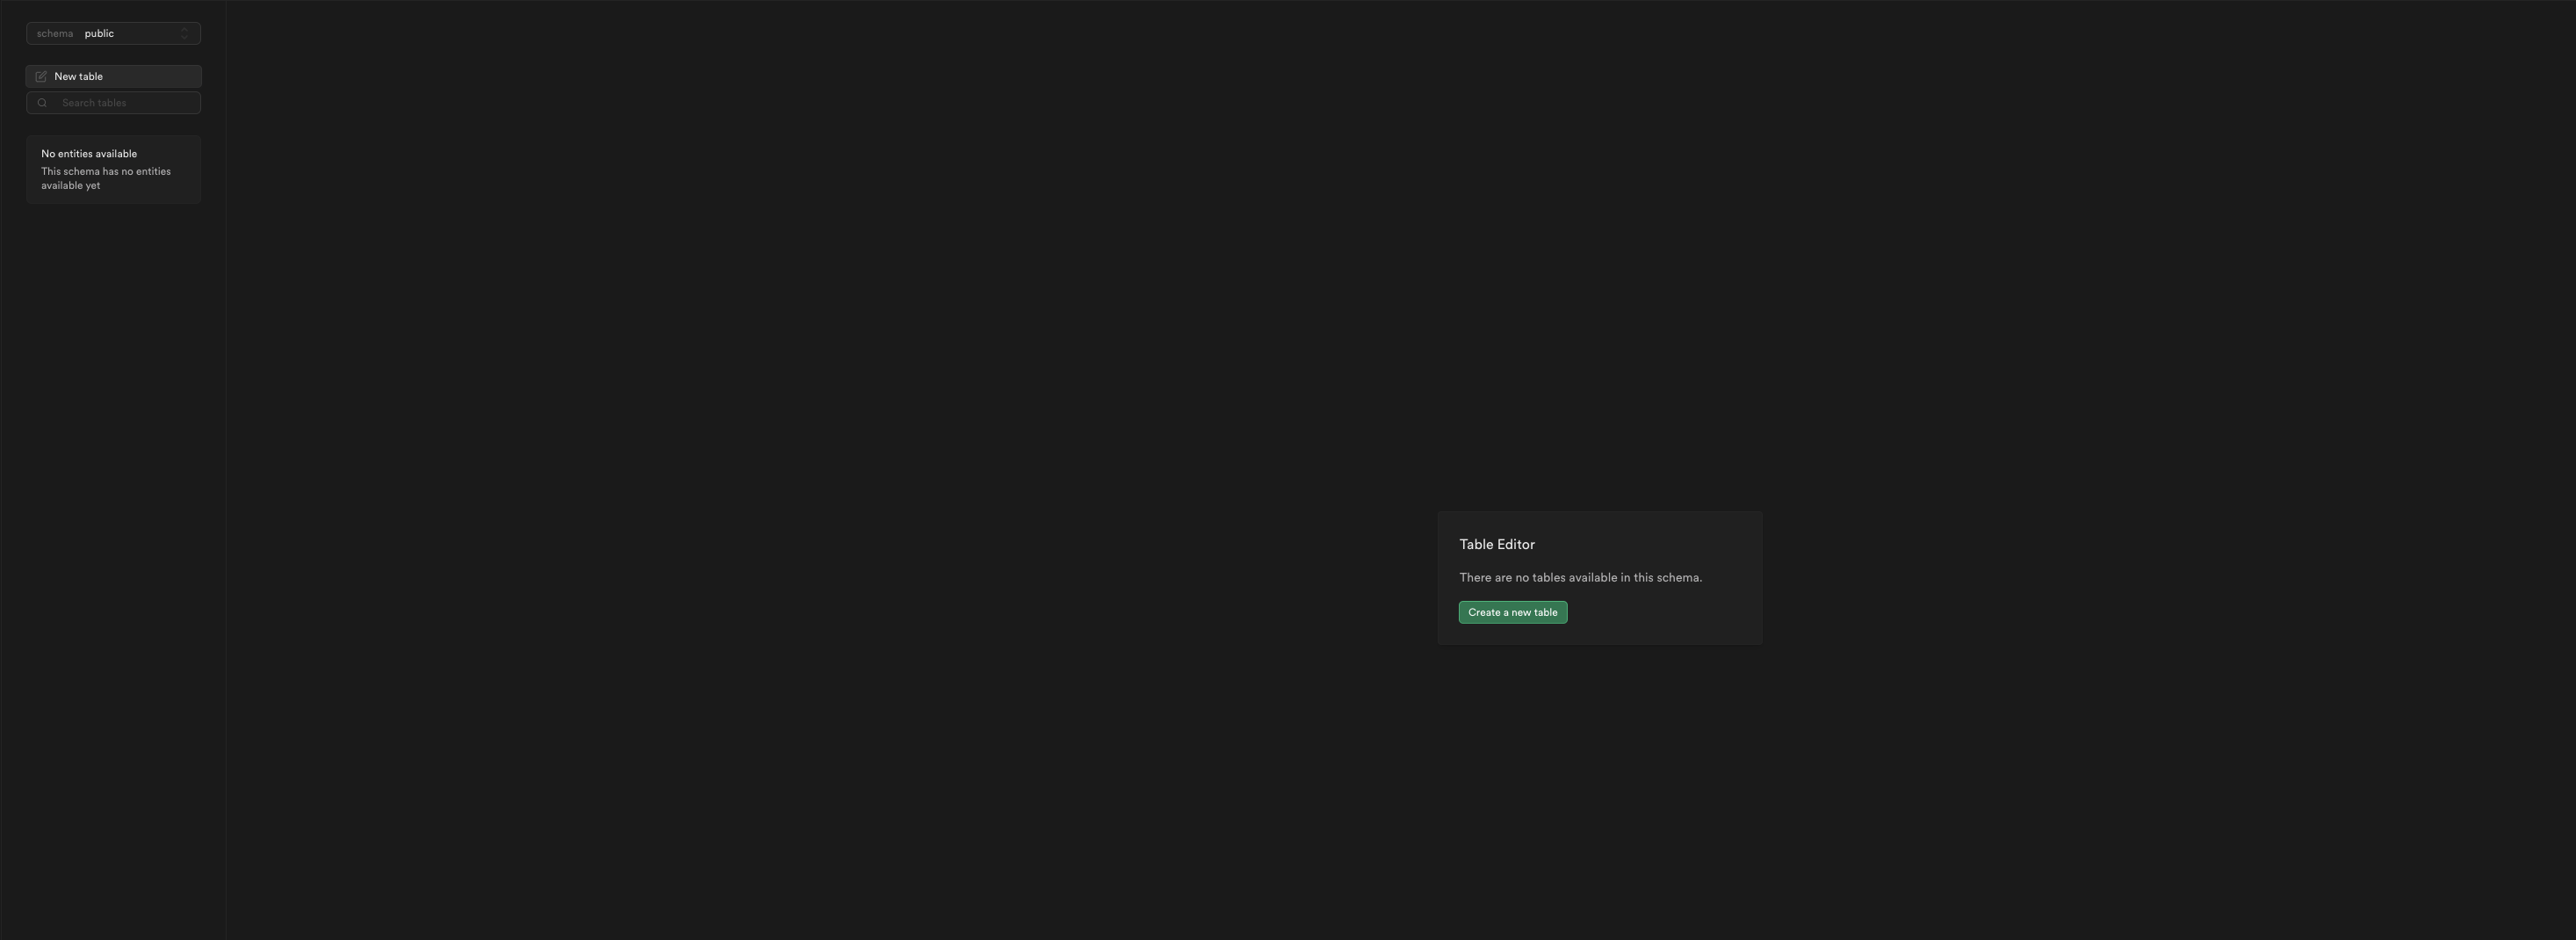
Add as many columns as you'd like. For the sake of this tutorial, we will create a table named "contacts" with the following columns.
Note that the column types are important and the RLS policies section is checked. This controls access to our table.

Next, we write a simple policy for our table. Without a row level policy, we will not be able to read, update or delete rows on our table.
On our blank table, click on "No active RLS policies" on the extreme right of the table.

Create a new policy and select "For full customization".
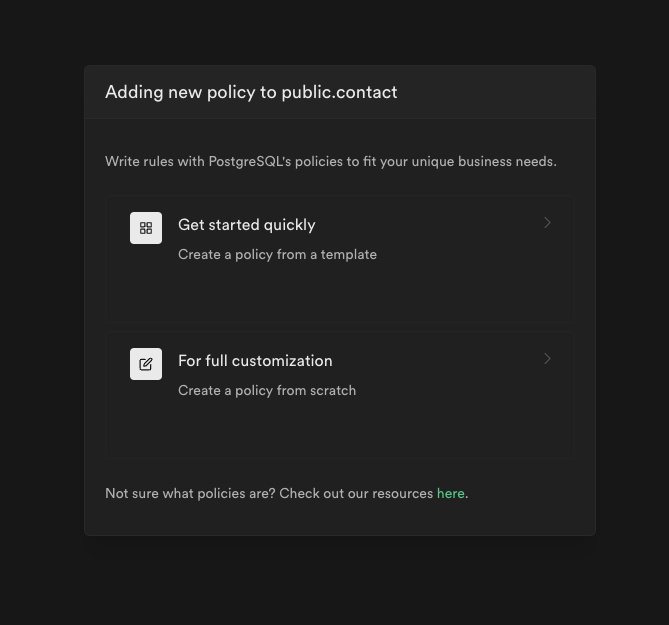
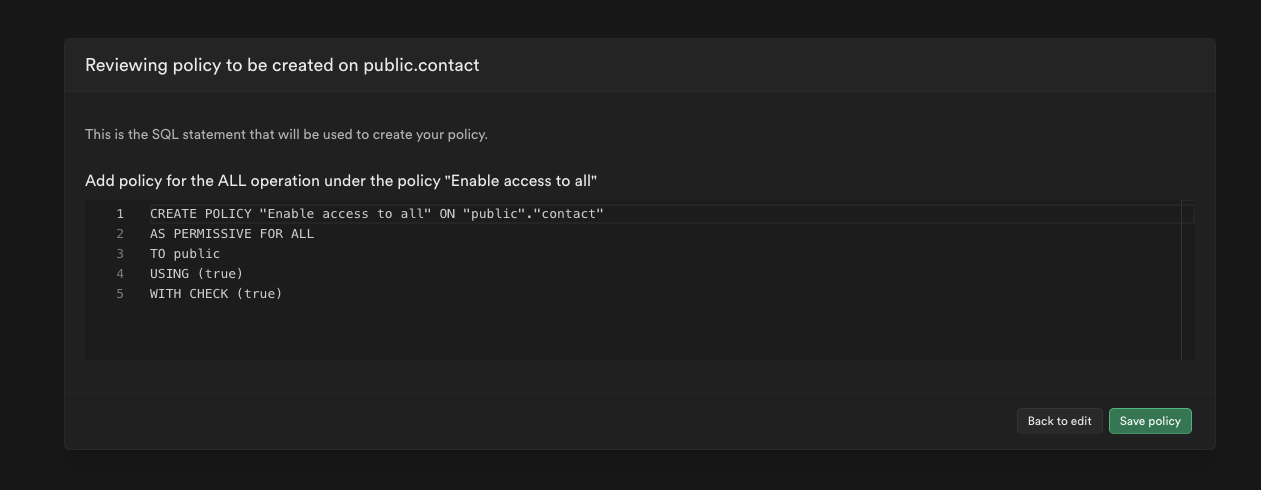
For the sake of this tutorial, we will enable access to all operations on our table. To read more about Row level security, visit this page in the documentation.
Follow the steps below.

We are all set to create our contact form now.
Contact form
To follow along with the Next JS project, check it out on Github.
Create a simple Next JS project
npx create-next-app contact-form
npm install formik yup @supabase/supabase-js
We install a few dependencies to help create the contact form and to interact with our supabase table.
To start, we create the supabase client in our next JS application using the supabase-js library. I added the Supabase base URL and our project's public key to the .env file to be used here. There is an example .env file in the github project.
import { createClient } from "@supabase/supabase-js";

const supabase = createClient(
    process.env.NEXT_PUBLIC_SUPABASE_URL,
    process.env.NEXT_PUBLIC_SUPABASE_ANON_KEY
);

export default supabase;
Next, we create a simple contact form with the following schema
...

const ContactSchema = Yup.object().shape({
    name: Yup.string().max(140, "Too long!").required("Required."),
    email: Yup.string().email("Invalid email.").max(140, "Too long!").required("Required."),
    body: Yup.string().max(280, "Too long!").required("Required."),
});

...
Any kind of form works here. I chose formik for convenience.

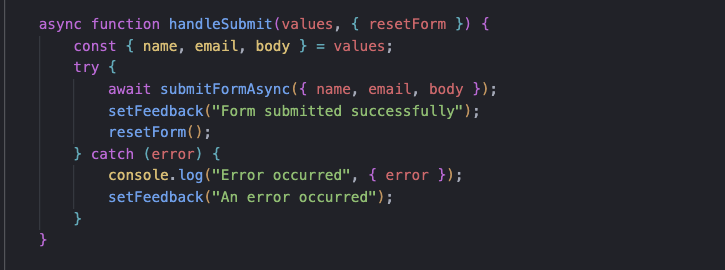
Next, we create the handleSubmit function to interact with our supabase table.
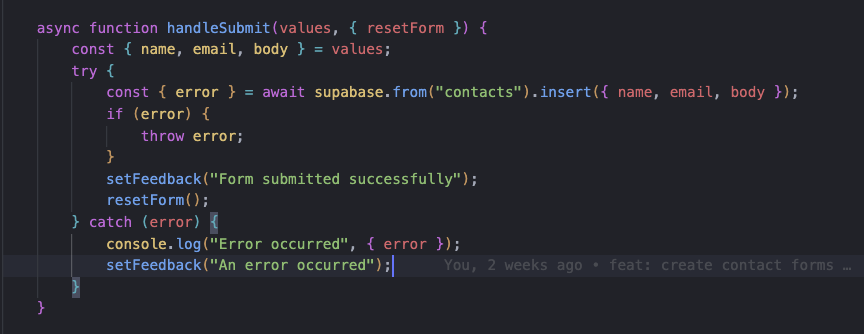
The supabase client is used to insert a new row into the exact table we created (contacts). If this works well, you should see the new row on your table.

Using React Query
Alternatively, you can use this with React Query.
First, create a hook

Then call the hook inside your contact form,
...

const { mutateAsync: submitFormAsync, isLoading: isSubmittingForm } = useUpdateContacts();

...
Then use this in your handleSubmit function instead
Conclusion
Note that for free accounts on Supabase, the project is paused after 7 days of inactivity.
I hope this tutorial helps to get started with supabase. This is part 1 of my Supabase and Next JS series.
Follow along to Part 2, How To Send Emails With Edge Functions On Supabase.
Header photo by Annie Spratt on Unsplash
Contact
Are you ready to work with me?


I'm actively open to new opportunities and requests.
If you have a question, or just want to say hi, I'll try my best to get back to you.